elasticsearch是近实时的搜索。
在elasticsearch中的搜索,有两类搜索:
queriesaggregations
它们之间的区别在于:query可以帮我们进行全文搜索,而aggregation可以帮我们对数据进行统计及分析。
我们有时也可以结合query及aggregation一起使用,比如我们可以先对文档进行搜索然后再进行aggregation
GET blogs/_search
{
  "query": {
    "match": {
      "title": "community"
    }
  },
  "aggregations": {
    "top_authors": {
      "terms": {
        "field": "author"
      }
    }
  }
}在上面的搜索中,先搜寻title含有community的文档,然后再对数据进行aggregation
在上面的查询中,我们使用了query dsl。
elasticsearch提供了一个基于json的完整query dsl(domain specific language)来定义查询。
它提供
- 全文搜索
- 聚合
- 排序,分页及操控响应
elasticsearch不仅支持简单的搜索功能,还支持多个条件的高级搜索,包括地理空间查询。
elasticsearch世界中有两种搜索变体:结构化搜索和非结构化搜索
由术语级搜索功能支持的结构化搜索返回的结果与相关性评分无关。
如果文档完全匹配,Elasticsearch 会获取文档,并且不关心它们是否紧密匹配或匹配程度如何。
例如,搜索一组日期之间的航班、搜索特定促销期间的畅销书等等都属于这一类。
执行搜索时,Elasticsearch 只检查匹配是否成功。
有或没有落在该日期之间的航班。要么有少数畅销书,要么没有。
没有什么属于其他可能的类别。
这种类型的结构化搜索由 Elasticsearch 中的术语级查询提供。
另一方面,在非结构化搜索中,Elasticsearch 检索与查询密切相关的结果。
根据结果与标准的相关程度对结果进行评分:高度相关的结果得分更高,因此位于结果命中的顶部。
搜索文本字段会产生相关结果。
Elasticsearch 提供全文搜索,目的是搜索非结构化数据。
搜索所有的文档
我们可以使用如下的命令搜索到所有的文档:
GET /_all/_search
GET /*/_search
GET /_search在这里我们没有指定任何index,我们将搜索在该cluster下的所有index。
目前默认的返回个数是10个,除非我们设定size
GET /_search?size=20
如果我们只想搜索特定的index,我们可以这样做:
GET twitter/_search
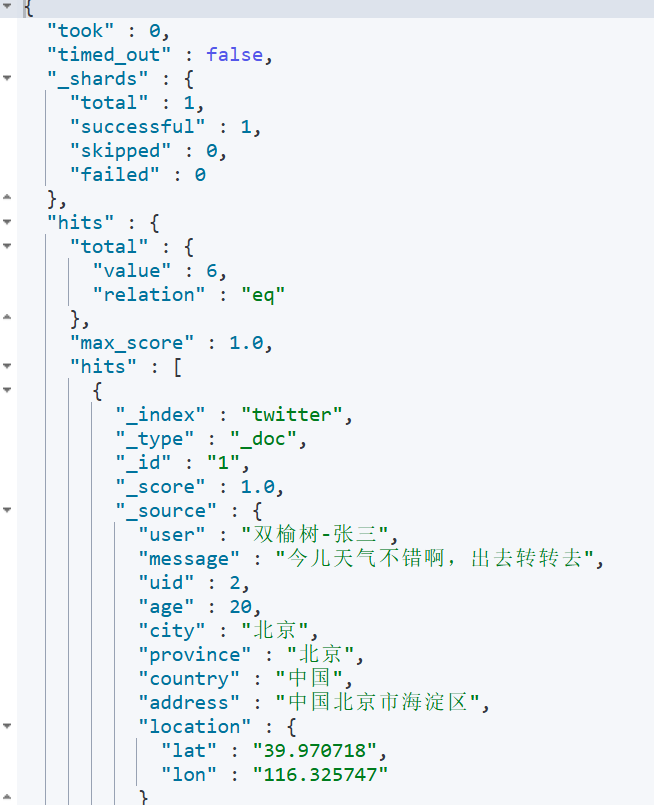
从上面我们可以看出,在twitter索引里我们有6个文档。
在上面的hits数组里,可以看到所有的结果。
同时,也可以看到一个叫做_score的项。
它表示我们搜索结果的相关度。
这个分数值越高,表没搜索匹配的相关度越高。
在默认没有sort的情况下,所有搜索的结果是按照分数由大到小来进行排列的。
在上面,我们可以看到relation字段的值为eq,它表明搜索的结果为7个文档。
这也是满足条件的所有文档,但是针对许多的大数据搜索,有时我们的搜索结果会超过10000个,那么这个返回的字段值会是gte
  "hits" : {
    "total" : {
      "value" : 10000,
      "relation" : "gte"
    },
它表明搜索的结果超过10000。如果我们想得到所有的结果。
可以在请求的参数中加入track_total_hits,并设置为true。
GET networks-firewall-session-2024.08.26/_search
{
  "track_total_hits": true
}
那么可以看到在返回的参数中,它正确地显示了所有满足条件的文档个数。
"hits" : {
    "total" : {
      "value" : 178150560,
      "relation" : "eq"
    },
在默认的情况下,我们可以得到10个结果。
我们可以设置size参数得到我们想要的个数。
同时,我们可以配合from来进行分页。
GET twitter/_search?size=2&from=2
上面的查询类似于dsl查询的如下语句:
GET twitter/_search
{
  "size": 2,
  "from": 2,
  "query": {
    "match_all": {}
  }
}我们可以通过filter_path来控制输出较少的字段,比如:
GET twitter/_search?filter_path=hits.total
上面的执行结果将只返回hits.total
{
  "hits" : {
    "total" : {
      "value" : 6,
      "relation" : "eq"
    }
  }
}我们甚至可以只返回搜索的分散_score,以及_source中的一部分
GET twitter/_search?filter_path=hits.hits._score,hits.hits._source.city
{
  "query": {
    "match": {
      "city": "上海"
    }
  }
}
返回的结果:
{
  "hits" : {
    "hits" : [
      {
        "_score" : 3.08089,
        "_source" : {
          "city" : "上海"
        }
      }
    ]
  }
}如果我们只想返回_source,而不包含meta字段,可以使用如下的方法:
GET twitter/_search?filter_path=hits.hits._source
{
  "query": {
    "match": {
      "city": "上海"
    }
  }
}
source filtering
我们可以通过_source来定义返回想要的字段:
GET twitter/_search
{
  "_source": ["user","city"],
  "query": {
    "match_all": {}
  }
}
我们也可以使用如下的方法:
GET twitter/_search
{
  "_source": {
    "includes": ["user", "city"]
  },
  "query": {
    "match_all": {
    }
  }
}我们可以通过设置_source为false,这样不返回任何的_source消息:
GET twitter/_search
{
  "_source": false,
  "query": {
    "match": {
      "user": "张三"
    }
  }
}
返回的消息:
    "hits" : [
      {
        "_index" : "twitter",
        "_type" : "_doc",
        "_id" : "1",
        "_score" : 3.0808902
      }
    ]
我们可以看到只有 _id 及 _score 等信息返回。其它任何的 _source 字段都没有被返回。
也可以接收通配符形式的控制,如:
GET twitter/_search
{
  "_source": {
    "includes": [
      "user*",
      "location*"
    ],
    "excludes": [
      "*.lat"
    ]
  },
  "query": {
    "match_all": {}
  }
}如果我们把_source设置为[],那么就是显示所有的字段,而不是不显示任何字段。
GET twitter/_search
{
  "_source": [],
  "query": {
    "match_all": {
    }
  }
}
script fields
有些时候,我们想要的field可能在_source里根本没有,那么可以使用script field来生成这些field。
允许为每个匹配返回script evaluation。例如:
GET twitter/_search
{
  "query": {
    "match_all": {}
  },
  "script_fields": {
    "years_to_100": {
      "script": {
        "lang": "painless",
        "source": "100-doc['age'].value"
      }
    },
    "year_of_birth":{
      "script": "2019 - doc['age'].value"
    }
  }
}
返回的结果是:
    "hits" : [
      {
        "_index" : "twitter",
        "_type" : "_doc",
        "_id" : "1",
        "_score" : 1.0,
        "fields" : {
          "years_to_100" : [
            80
          ],
          "year_of_birth" : [
            1999
          ]
        }
      },
      {
        "_index" : "twitter",
        "_type" : "_doc",
        "_id" : "2",
        "_score" : 1.0,
        "fields" : {
          "years_to_100" : [
            70
          ],
          "year_of_birth" : [
            1989
          ]
        }
      },
    ...
  ]
count api
我们经常回查询我们的索引里到底有多少文档,那么可以使用_count来查询:
GET twitter/_count
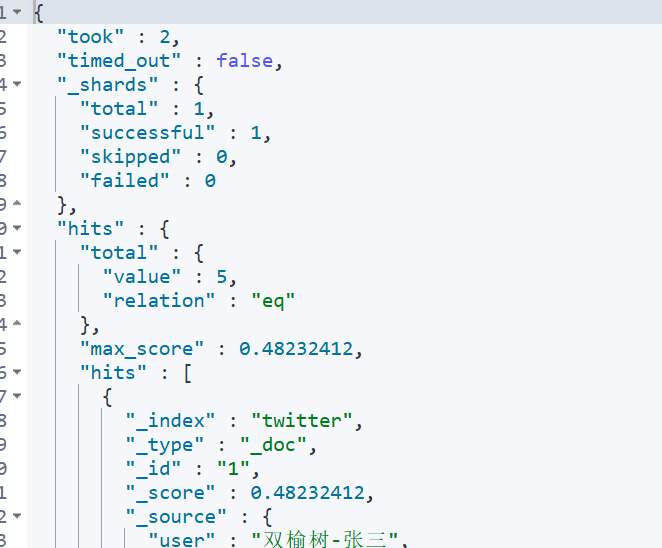
如果我们想知道满足条件的文档的数量,我们可以采用如下的格式:
GET twitter/_count
{
  "query": {
    "match": {
      "city": "北京"
    }
  }
}我们可以得到city为北京的所有文档的数量:
{
  "count" : 5,
  "_shards" : {
    "total" : 1,
    "successful" : 1,
    "skipped" : 0,
    "failed" : 0
  }
}
修改settings
我们可以通过如下的接口获得一个index的settings
GET twitter/_settings
{
  "twitter" : {
    "settings" : {
      "index" : {
        "creation_date" : "1724224141087",
        "number_of_shards" : "1",
        "number_of_replicas" : "1",
        "uuid" : "ptZulAQmRQW69RKB5aYRLw",
        "version" : {
          "created" : "7080199"
        },
        "provided_name" : "twitter"
      }
    }
  }
}我们可以看到twitter索引有多少个shards及多少个replicas。
我们可以通过如下的接口来设置:
PUT twitter
{
  "settings": {
    "number_of_shards": 1,
    "number_of_replicas": 1
  }
}一旦我们把number_of_shards定下来了,我们就不可以修改了,除非把index删除,并重新index它。
这是因为每个文档存储到哪一个shard是和number_of_shards这个数值有关的。
一旦这个数值发生改变,那么之后寻找那个文档所在的shard就会不准确。
修改索引的mapping
elasticsearch号称是schemaless,每一个index都有一个相应的mapping。
这个mapping在我们生成第一个文档时就已经产生。
它是对每个输入的字段进行自动的识别从而判断它们的数据类型。我们可以这么理解schemaless
- 不需要事先定义一个相应的
mapping才可以生产文档。字段类型是动态进行识别的。这个传统的数据库是不一样的 - 如果有动态加入的新字段,
mapping也可以自动调整并识别新加入的字段。
自动识别有一个问题,那就是有的字段可能识别并不精确,比如位置信息。那么需要对这个字段进行修改。
我们可以通过如下的命令来查询目前index的mapping:
GET twitter/_mapping
可以看出来location里的经纬度是一个multi-field的类型
        "location" : {
          "properties" : {
            "lat" : {
              "type" : "text",
              "fields" : {
                "keyword" : {
                  "type" : "keyword",
                  "ignore_above" : 256
                }
              }
            },
            "lon" : {
              "type" : "text",
              "fields" : {
                "keyword" : {
                  "type" : "keyword",
                  "ignore_above" : 256
                }
              }
            }
          }
}这个显然不是我们所需的。正确的类型应该是:geo_point。我们需要重新修正mapping
注意:我们不能为已经建立好的index动态修改mapping。
这是因为一旦修改,那么之前建立的索引就变成不能搜索了。
一种办法是reindex从而重新建立我们的索引。
为了能够正确地创建我们的mapping,我们必须先把之前的twitter索引删除掉,并同时使用settings来创建这个index。
正确的步骤如下:
DELETE twitter
PUT twitter
{
  "settings": {
    "number_of_shards": 1,
    "number_of_replicas": 1
  }
}

PUT twitter/_mapping
{
  "properties": {
    "address": {
      "type": "text",
      "fields": {
        "keyword": {
          "type": "keyword",
          "ignore_above": 256
        }
      }
    },
    "age": {
      "type": "long"
    },
    "city": {
      "type": "text",
      "fields": {
        "keyword": {
          "type": "keyword",
          "ignore_above": 256
        }
      }
    },
    "country": {
      "type": "text",
      "fields": {
        "keyword": {
          "type": "keyword",
          "ignore_above": 256
        }
      }
    },
    "location": {
      "type": "geo_point"
    },
    "message": {
      "type": "text",
      "fields": {
        "keyword": {
          "type": "keyword",
          "ignore_above": 256
        }
      }
    },
    "province": {
      "type": "text",
      "fields": {
        "keyword": {
          "type": "keyword",
          "ignore_above": 256
        }
      }
    },
    "uid": {
      "type": "long"
    },
    "user": {
      "type": "text",
      "fields": {
        "keyword": {
          "type": "keyword",
          "ignore_above": 256
        }
      }
    }
  }
}重新查看我们的mapping:
GET twitter/_mapping
我们可以看到我们已经创建好了新的mapping。
再次允许之前的bulk接口,并把我们所需要的数据导入到twitter索引中
POST _bulk
{ "index" : { "_index" : "twitter", "_id": 1} }
{"user":"双榆树-张三","message":"今儿天气不错啊,出去转转去","uid":2,"age":20,"city":"北京","province":"北京","country":"中国","address":"中国北京市海淀区","location":{"lat":"39.970718","lon":"116.325747"}}
{ "index" : { "_index" : "twitter", "_id": 2 }}
{"user":"东城区-老刘","message":"出发,下一站云南!","uid":3,"age":30,"city":"北京","province":"北京","country":"中国","address":"中国北京市东城区台基厂三条3号","location":{"lat":"39.904313","lon":"116.412754"}}
{ "index" : { "_index" : "twitter", "_id": 3} }
{"user":"东城区-李四","message":"happy birthday!","uid":4,"age":30,"city":"北京","province":"北京","country":"中国","address":"中国北京市东城区","location":{"lat":"39.893801","lon":"116.408986"}}
{ "index" : { "_index" : "twitter", "_id": 4} }
{"user":"朝阳区-老贾","message":"123,gogogo","uid":5,"age":35,"city":"北京","province":"北京","country":"中国","address":"中国北京市朝阳区建国门","location":{"lat":"39.718256","lon":"116.367910"}}
{ "index" : { "_index" : "twitter", "_id": 5} }
{"user":"朝阳区-老王","message":"Happy BirthDay My Friend!","uid":6,"age":50,"city":"北京","province":"北京","country":"中国","address":"中国北京市朝阳区国贸","location":{"lat":"39.918256","lon":"116.467910"}}
{ "index" : { "_index" : "twitter", "_id": 6} }
{"user":"虹桥-老吴","message":"好友来了都今天我生日,好友来了,什么 birthday happy 就成!","uid":7,"age":90,"city":"上海","province":"上海","country":"中国","address":"中国上海市闵行区","location":{"lat":"31.175927","lon":"121.383328"}}
至此,我们已经完整地建立我们所需要的索引。
下面,我们开始使用DSL(domain secific language)来进行查询。
查询数据
我们来展示一下从ES索引中查询我们所想要的数据
match query
GET twitter/_search
{
  "query": {
    "match": {
      "city": "北京"
    }
  }
}
从查询的结果来看,可以看到有5个用户是来自背景的,而且查询出来的结果是按照相关性(relevance)来进行排序的。
分数越高,就越排在前面。我们再做如下的一个查询:
GET twitter/_search?filter_path=**.hits
{
  "_source": [
    "message"
  ],
  "query": {
    "match": {
      "message": "出"
    }
  }
}上面的查询搜索在message中含有出这个字的文档:
{
  "hits" : {
    "hits" : [
      {
        "_index" : "twitter",
        "_type" : "_doc",
        "_id" : "2",
        "_score" : 1.0764678,
        "_source" : {
          "message" : "出发,下一站云南!"
        }
      },
      {
        "_index" : "twitter",
        "_type" : "_doc",
        "_id" : "1",
        "_score" : 0.8456129,
        "_source" : {
          "message" : "今儿天气不错啊,出去转转去"
        }
      }
    ]
  }
}
我们可以看到第一个文档的分数比较高,是因为它的句子比较短,虽然两个句子都含有 出。
如果我们想限定一个分数的最小值来减少返回文档的数,我们可以定义 min_score:
GET twitter/_search?filter_path=**.hits
{
  "min_score": 1.0,
  "_source": [
    "message"
  ],
  "query": {
    "match": {
      "message": "出"
    }
  }
}
上面我们指定了 min_score 为 1.0,那么只有一个文档满足要求:
{
  "hits" : {
    "hits" : [
      {
        "_index" : "twitter",
        "_type" : "_doc",
        "_id" : "2",
        "_score" : 1.0764678,
        "_source" : {
          "message" : "出发,下一站云南!"
        }
      }
    ]
  }
}
留言