内容目录
华三F5000防火墙配置
- 日志设置-->基本设置-->系统日志-->新建日志主机:
ip地址为logstash的地址,端口号是514 - 日志设置-->基本设置-->快速日志:日志信息时间戳选择设备本地时间
- 日志设置-->会话日志:日志类型选择快速日志、记录新建会话的日志;然后添加生成日志的接口列表
Rsyslog配置
# 监听udp 514端口
$ModLoad imudp
$UDPServerRun 514

# 配置日志存储模版
$template FirewallTemplate,"%timereported:::date-rfc3339% %hostname% %fromhost-ip% %msg:::sp-if-no-1st-sp%%msg:::drop-last-lf%\n"

# 配置存储位置
$template Firewall,"/firewall/f5000session/%$NOW%.log"

# 会话表传送时不带facility local* 等级,所以通过IP地址匹配。
if $fromhost-ip == "x.x.x.x" then action(type="omfile" FileCreateMode="0755" DirCreateMode="0755" dynaFile="Firewall" template="FirewallTemplate")
重启服务:
systemctl restart rsyslog.service
logstash配置
input插件配置:
vim /etc/logstash/conf.d/network.logstash.conf
input {
  file {
    path => ["/firewall/f5000session/*.log"]
    type => firewall_session
    start_position => "beginning"
    sincedb_path => "/firewall/f5000session/incedb"
  }
}filter插件配置
filter {
if [type] == "firewall_session"{
        grok {
                match => {
                "message" => [
                # v4会话的匹配
                "%{TIMESTAMP_ISO8601:date}\s\d+\s[\s\S]+IPV%{NUMBER:version}\S.*Protocol\(1001\)=%{URIPROTO:protocol};Application\(1002\)=%{USERNAME:app};\S+SrcIPAddr\(1003\)=%{IP:srcip};SrcPort\(1004\)=%{USERNAME:srcport};NatSrcIPAddr\(1005\)=%{IP:natsrcip};NatSrcPort\(1006\)=%{USERNAME:natsrcport};DstIPAddr\(1007\)=%{IP:dstip};DstPort\(1008\)=%{USERNAME:dstport};NatDstIPAddr\(1009\)=%{IP:natdstip};NatDstPort\(1010\)=%{USERNAME:natdstport}",
                # v6会话的匹配
                "%{TIMESTAMP_ISO8601:date}\s\d+\s[\s\S]+IPV%{NUMBER:version}\S.*Protocol\(1001\)=%{URIPROTO:protocol};Application\(1002\)=%{USERNAME:app};\S+SrcIPv6Addr\(1036\)=%{IP:srcip};SrcPort\(1004\)=%{USERNAME:srcport};DstIPv6Addr\(1037\)=%{IP:dstip};DstPort\(1008\)=%{USERNAME:dstport}"
                        ]
                }
        }
}
        date {
                match => [ "syslog_timestamp", "MMM  d HH:mm:ss", "MMM dd HH:mm:ss" ]
        }
        mutate {
                remove_field => ["message"]
        }
        # 如果目的地址等于地址转换后的目的地址,就是nat outbound,把natdstip和natdstport删掉,好后续判断且节省空间
        if[dstip] == [natdstip] {
                mutate {
                        remove_field => [ "natdstip", "natdstport" ]
                }
        }
        # 如果源地址地址等于地址转换后的源地址,就是nat server,把natsrcip和natsrcport删掉,好后续判断且节省空间
        if[srcip] == [natsrcip] {
                mutate {
                        remove_field => [ "natsrcip", "natsrcport" ]
                }
        }
if [version] == "4"{
        elasticsearch {
        hosts => ["x.x.x.x:9200","x.x.x.x:9200","x.x.x.x:9200"]
        user => "elastic"
        password => "xxxxxx"
        query_template => "search-by-ipv4.json"
        index => "ipaddrfordep"
        fields => {
        "department" => "[department]"
                }
        }
}
if [version] == "6"{
        elasticsearch {
        hosts => ["x.x.x.x:9200","x.x.x.x:9200","x.x.x.x:9200"]
        user => "elastic"
        password => "xxxxxx"
        query_template => "search-by-ipv6.json"
        index => "ipaddrfordep"
        fields => {
        "department" => "[department]"
                }
        }
   }
}
# search-by-ipv4.json文件内容
{
"size": 1,
"query":{
"bool": {
"must":
{
"match": {
"range.ipv4range": "%{[srcip]}"
}
}
}
}
}
# search-by-ipv6.json文件内容
{
"size": 1,
"query":{
"bool": {
"must":
{
"match": {
"range.ipv6range": "%{[srcip]}"
}
}
}
}
}注意:search-by-ipv4.json、search-by-ipv6.json如果放在目录/etc/logstash/conf.d下,
就要在该目录下输入以下命令运行logstash
/usr/share/logstash/bin/logstash -f /etc/logstash/conf.d/network.logstash.conf
output插件配置
output {
if [type] == "firewall_session"{
    elasticsearch {
      index => "networks-firewall-session-%{+YYYY.MM.dd}"
      hosts => ["x.x.x.x:9200","x.x.x.x:9200","x.x.x.x:9200"]
      user => "elastic"
      password => "xxxxxx"
    }
 }
}
elastic配置(在kibana上配置)
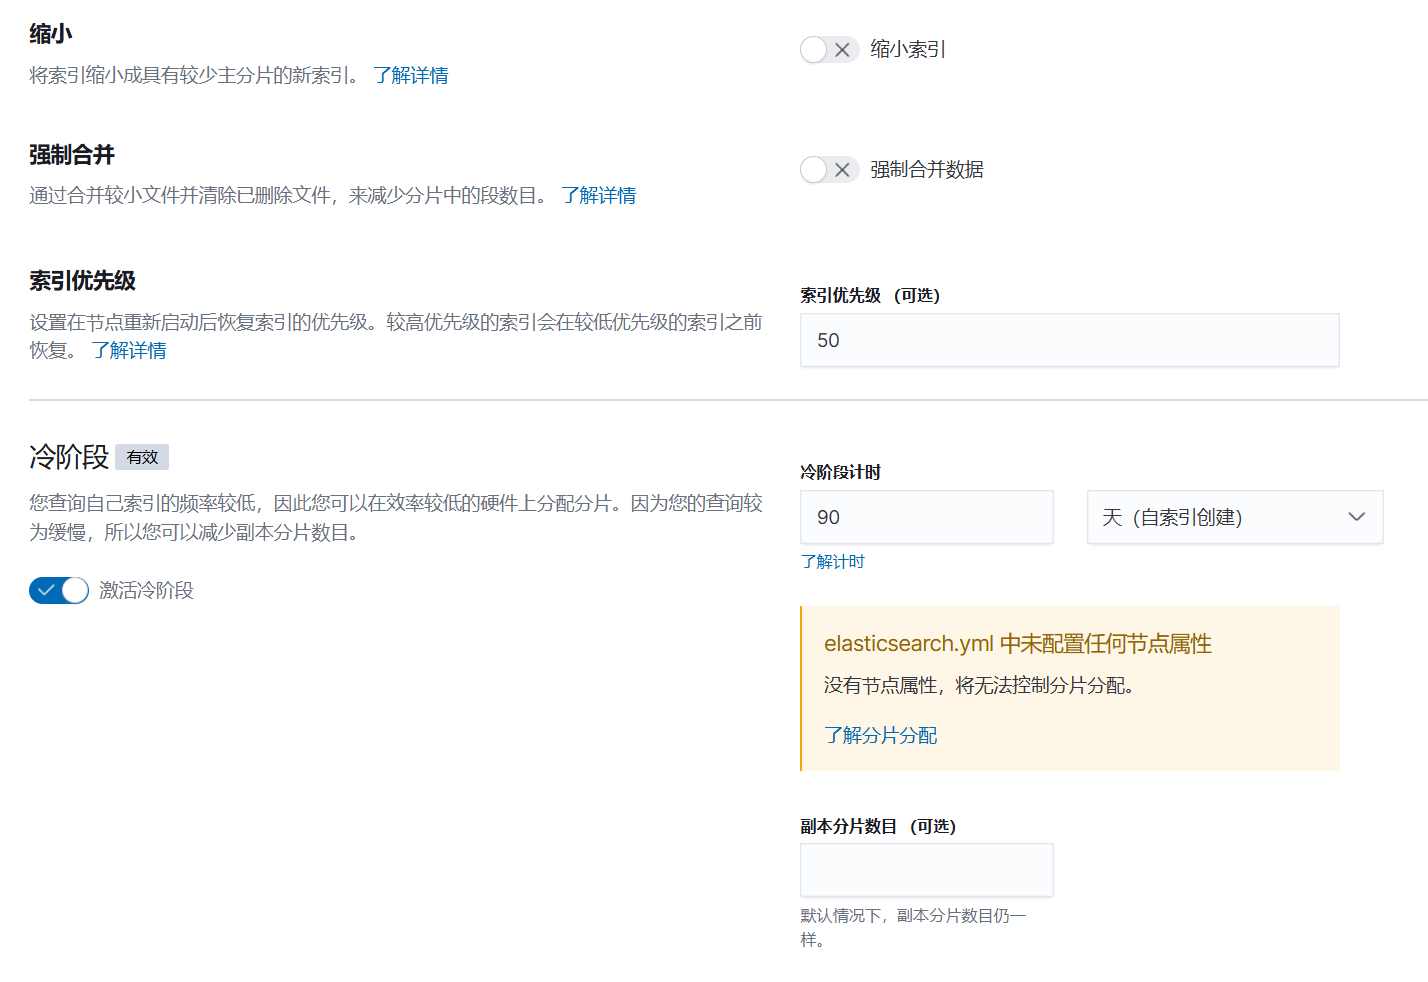
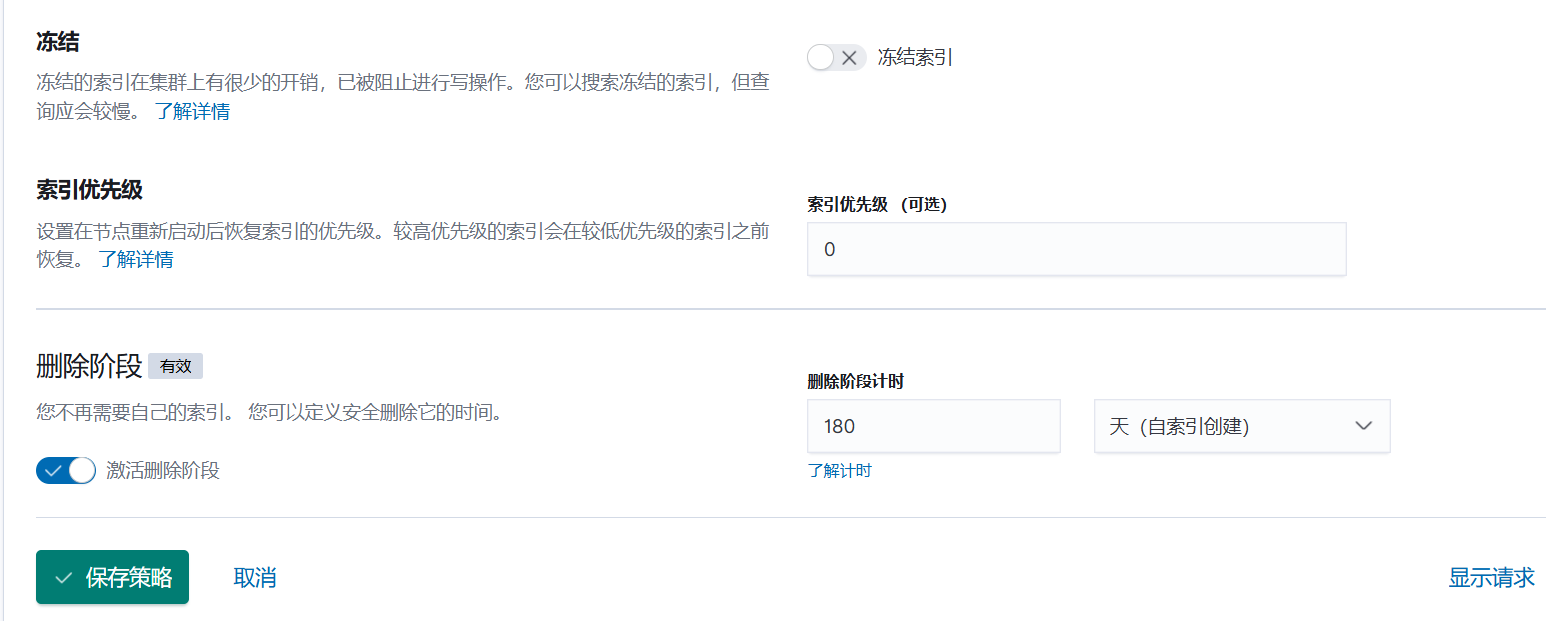
- 配置索引生命周期
firewall-session-index-policy-02

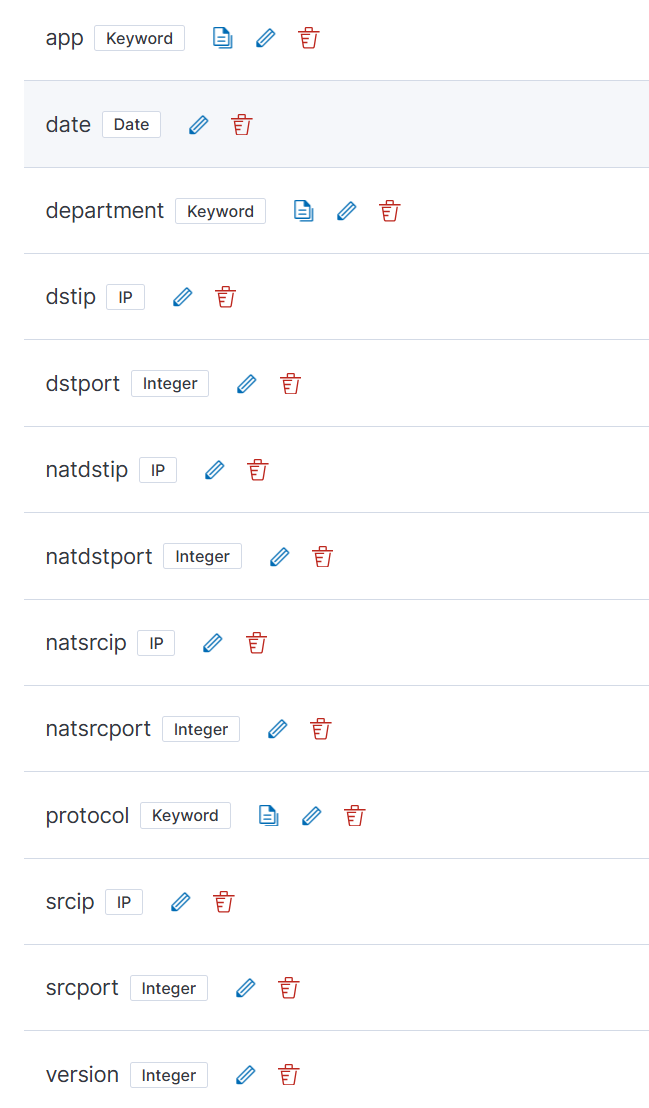
- 配置索引模板
firewall-index-template- 映射如下配置:
- 生命周期如下配置
{
  "index": {
    "lifecycle": {
      "name": "firewall-session-index-policy-02",
      "rollover_alias": "firewall-session"
    }
  }
}- 索引管理
配置好后在索引管理上会看到名称为networks-firewall-session-2024.08.29的索引
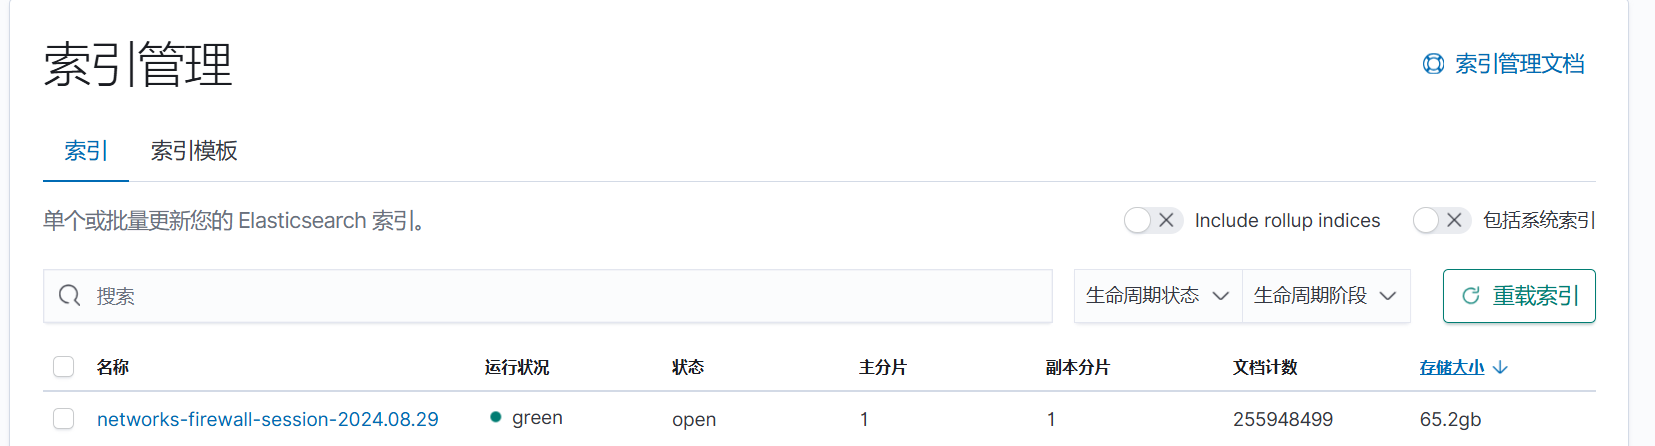
然后添加好networks-firewall-session*的索引模式
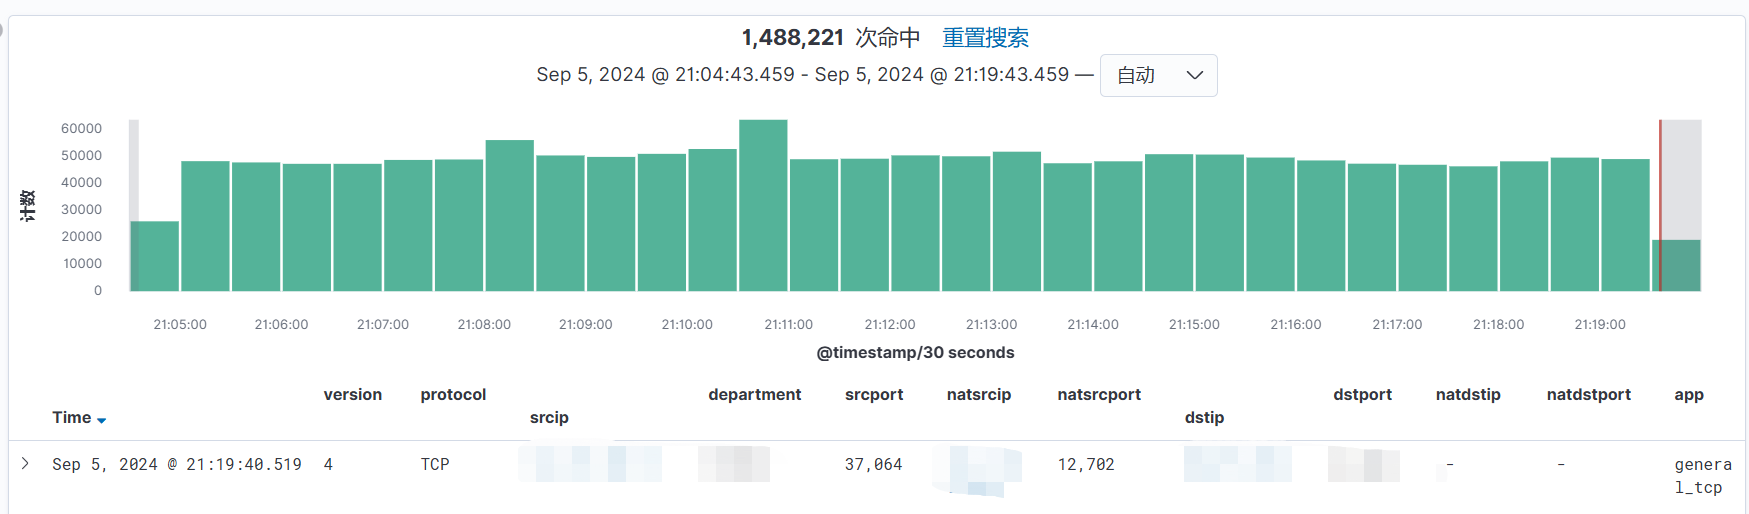
discover菜单
留言